Red Dead 2 Horse Guide: General Tips, Stables, And Finding One Of The Best Horses Early
Compared to its predecessor, horses play a much bigger role in Red Dead Redemption 2 than you might think. So much so that it can be overwhelming if you haven’t been paying close attention to the tutorial messages. Horses have been made to feel like living, breathing creatures this time around, and as such, you need to commit to taking care of them and being cautious of their temperament.
To help you wrap your head around Red Dead Redemption 2’s horses, we detail below and in the video above everything you need to know to properly care for your steed. If you’re more of an experienced rider and want to know what are the best horses out there, we’ve gathered that information in our best horses guide.
For more guides like this, be sure to check out our guides roundup containing features highlighting all the tips you should know before playing and things the game doesn’t tell you. And if you want to have some extra fun, be sure to read our feature detailing the game’s cheat codes. Though, if you’re a curious outsider looking in and want to know whether or not this game for you, then read our Red Dead 2 review if you haven’t already.
How To Ride Your Horse And Maintain Its Cores
Horse controls are relatively simple. Tap the X or A button repeatedly to speed up and R1 or RB to slow down. You can double tap and hold X or A to match a companion’s speed, and if you tap X or A in rhythm with your horse’s gallop you will conserve stamina.
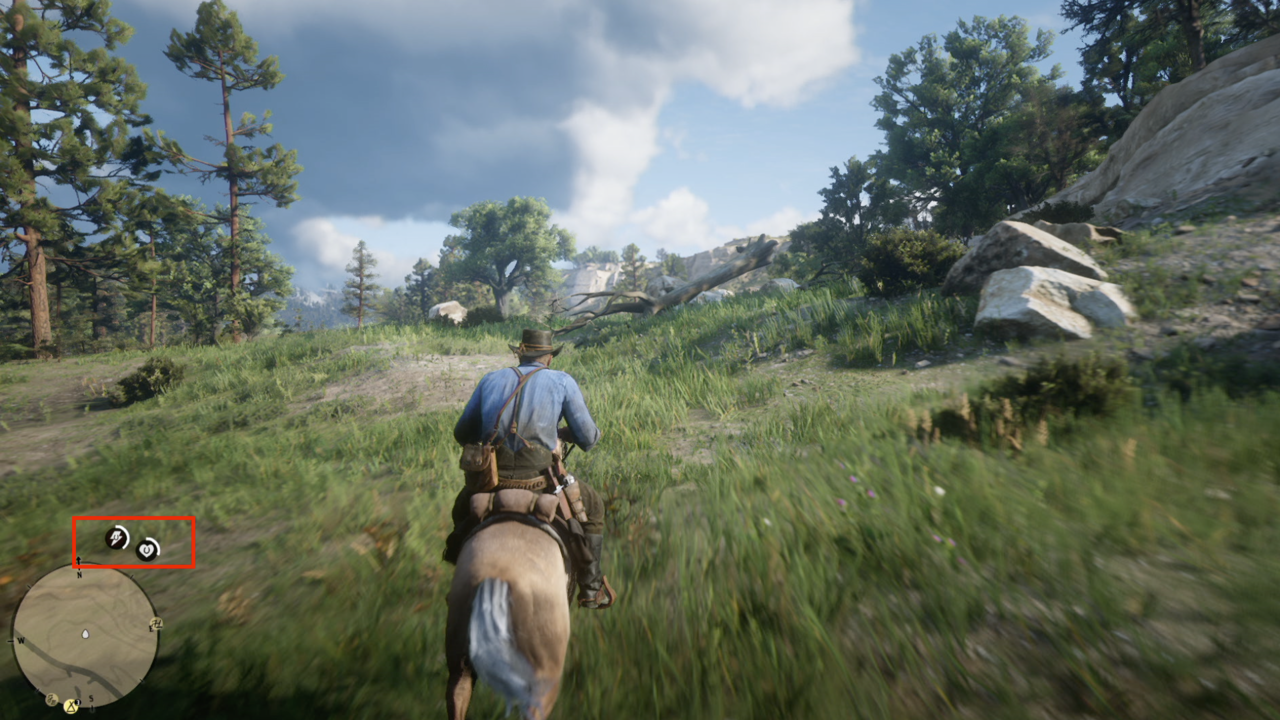
As you ride your horse, you’ll want to keep an eye on its Cores. Like Arthur’s Cores, the heart is your horse’s Health Core and the lightning bolt is its Stamina Core–they’ve just got fancy little horseshoes in them. The symbol at the center of the circle represents the Core, while the ring meter that surrounds it is known as a bar.
The more you push your horse, the quicker the Stamina bar will deplete. And if you don’t feed your horse every now and then, its Cores will drain and it won’t have as much Stamina or Health in its associated bars. It will also look sad and run with its head down, so try to stock up on horse foods and revival items from the General Store to keep your horse well.
Your horse will get dirty over time as you ride it. If this happens, its meters will drain 25% quicker. You can clean it with your brush or by riding it through water. The former is acquired after completing the story mission, “Exit Pursued by a Bruised Ego.” It’s also worth noting that your horse’s cores will refill when you sleep.
There are ways to notice when something is awry with your horse. A flashing red exclamation point in the Stamina Core indicates your horse is scared/stressed (you need to press L3 to calm it) while a flashing red brush in the health core means your horse is dirty.
Leveling Your Horse
While mostly identical to how Arthur’s Cores work, where horse Cores differ is how you increase their level. Instead of leveling them up by moving and withstanding damage, you develop your horse’s Cores and bars by forming a stronger bond with them. As you ride, feed, and clean your horse, your bond will strengthen. And as that bond grows, your horse’s Health and Stamina bars will increase.
Your horse will even learn advanced maneuvers. At level 2, you can rear your horse back by pressing R1 or RB with square or X. There isn’t really a use for this other than to look threatening from time to time–that or to just feel like a cool cowboy from an old western film. At level 3 you learn how to skid. While sprinting, press R1 or RB and you can either bring your horse to a halt or change directions at a moment’s notice. Finally at level 4 you learn how to drift and piaffe, which is a fancy word for strafe. As your bond increases your horse will also respond to your call from greater and greater distances, and its stats, including speed, will get a slight bump. If you wanna see how close you are to the next level, you can check the player menu when you the press the pause button.
You can expedite bonding by feeding your horse treats. And the stronger your bond is with a horse, the longer it will take to bleed out if it gets knocked down. It takes 60 minutes real time for a level 4 horse to die, so that gives you plenty of time to get to town and purchase a horse reviver from the General Store.
Horse Stables And Upgrading Your Horse’s Stats
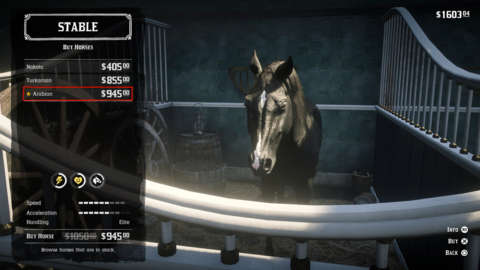
If you wanna get the most out of your level 4 horse, you’ll want to stop at a stable and upgrade its saddle. Most items for sale are cosmetics, but there are a few things that can improve your horse’s stats, like the stirrups and the saddles.
But WAIT, you say! I can’t seem to enter the stable, and I can’t find a stupid brush to clean my horse. Well that probably means you’re screwing around too much and not doing any story missions. Once you complete “Exit Pursued by a Bruised Ego,” you will have access to stables across the map and your horse brush.
While at the stables, you can also rename, sell, and buy horses. You can sell both stolen horses and horses you’ve acquired legally. Stolen horses won’t fetch as good a price at stables, but at a certain point in the story you will meet some characters willing to purchase stolen horses for a better profit. Level 4 horses will also fetch a higher price, so if you plan on flipping a horse, so we recommend leveling it up first.
Breaking Horses
If you are looking to buy a horse, the first thing you’ll probably notice is that good horses ain’t cheap. As attached as you’ll become with your first, Tennessee Walker, he’s not exactly the powerhouse you’ll want by your side throughout the entire game. And if the best horses are too expensive, that means you’ll have to find some out in the wild and break ’em yourself. Lucky for you, one of the best horses in the game can be acquired for free at the beginning of chapter 2 and onward. But before we get to that, let’s learn how to break a horse.
As you explore the world, you’ll find wild horses everywhere. Big horses, little horses, painted horses, black horses, and so on. There are a dozen different breeds roaming the frontier, all with unique stats and attributes. If you see a horse you’re interested in, first take out your binoculars. Once you study the horse you will be given a prompt to “show info.” Hit that, and you can check out the horses stats and its breed details.
There are two ways to go about breaking a horse. You can chase it down, lasso it, and hop on its back, or you can approach it slowly, calming it if it gets spooked. Once you get close enough, you can hop on its back. While you might be inclined to take on the first method, it’s much easier to break a horse if you approach it slowly. Once you’re on its back, pull back the left stick and subtly tilt the right stick to balance while calming it with square or X. If it bucks you, chase it down. When it calms down a bit, you can repeat the process.
How To Find One Of The Best Horses Early: The White-Maned Arabian
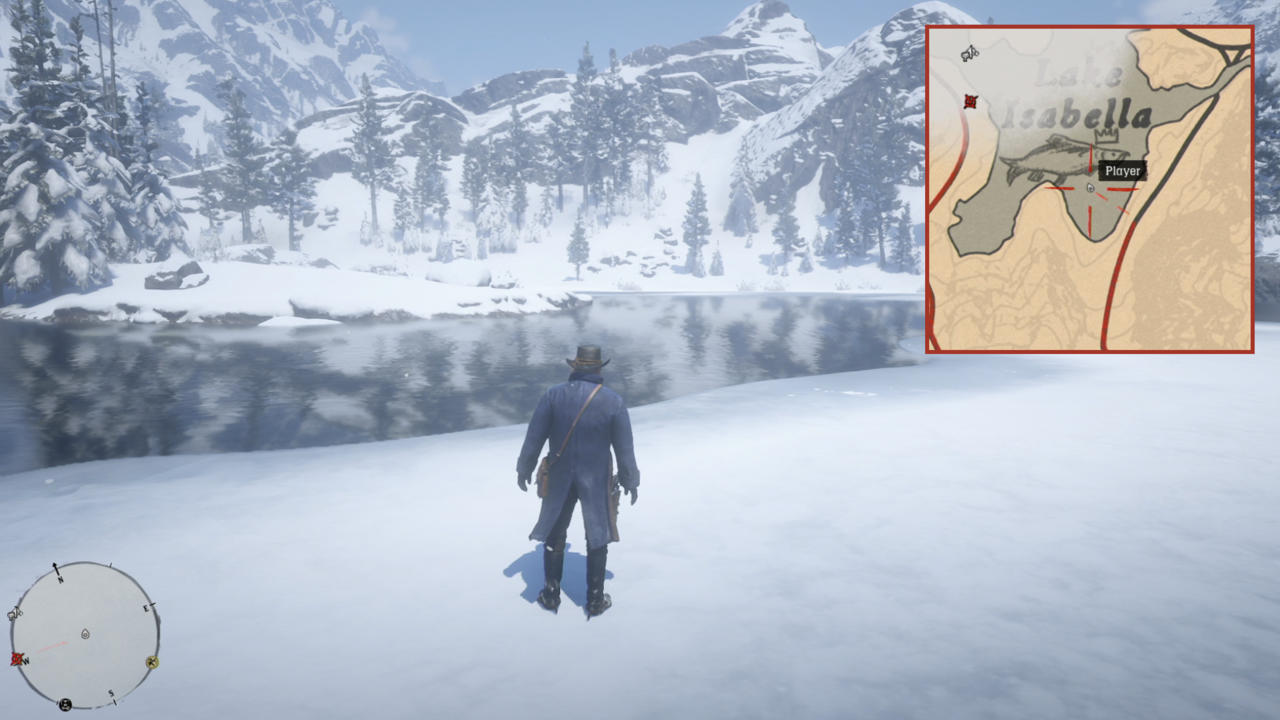
Once you feel comfortable breaking horses, pack up a thick jacket and head up to the Grizzlies to find the White-Maned Arabian. This snow-white beauty wanders around Lake Isabella and can be found early on. It’s quite difficult to tame, so you’re going to need to be persistent in following it around and calming it down enough before you can approach it. If it bucks you and escapes, well, it’s gonna be a while before another one respawns.
Once you do break it, put your saddle on it and take it to the nearest stable. Technically the horse will be yours once you put the saddle on, but take it back to a stable just in case–you can never be too careful!
Powered by WPeMatico


